Shop Vacuum Blows Dust Back Out: Filter, Bag, Seal, and Float Checks
When a shop vacuum blows dust out through its exhaust, stop using it for dusty cleanup until you find the cause. A wet/dry vacuum should keep ordinary dry debris inside the tank and filter system. Visible dust escaping from the exhaust often means air is bypassing the filter, the filter media is damaged or unsuitable, or a collection bag is missing or installed incorrectly.
Safety note: Turn the vacuum off, unplug it, or remove its battery before opening the tank, touching the filter, or checking the float. Avoid creating a dust cloud while emptying or cleaning it. Do not use an ordinary shop vacuum for potentially hazardous or combustible dust unless the equipment and procedure are specifically suitable for that material.
Fine dust is the most important clue. OSHA notes that discharge from a non-HEPA-filtered vacuum can add respirable dust to the immediate work area. That matters especially after concrete, masonry, drywall, lead-paint, or similar work. For questionable materials, follow the applicable work rules and use the exact vacuum, filter, and cleanup method specified for the job rather than trying to adapt a general-purpose shop vac.
For normal wood dust, household dirt, or shop debris, work through the checks below in order. Most cases of a shop vacuum blows dust out complaint are resolved before any motor repair is needed.
Shop vacuum blows dust out: start with the filter
The filter is the first barrier between collected debris and the motor exhaust. A vacuum can still have strong suction while its filter is leaking dust, so suction alone does not prove the filtration system is working correctly.
- Confirm that a filter is installed for dry pickup. Many wet/dry vacuums require a cartridge, pleated, foam, or model-specific filter arrangement when collecting dry debris. Do not assume a bare filter cage or float assembly is adequate for dry cleanup.
- Verify the filter is the correct type for the vacuum and the material. A general cartridge filter may be appropriate for coarse debris but may not control very fine dust as effectively as a fine-dust or HEPA-rated option made for the specific vacuum. Use only compatible replacement parts identified in the owner’s manual or by the manufacturer.
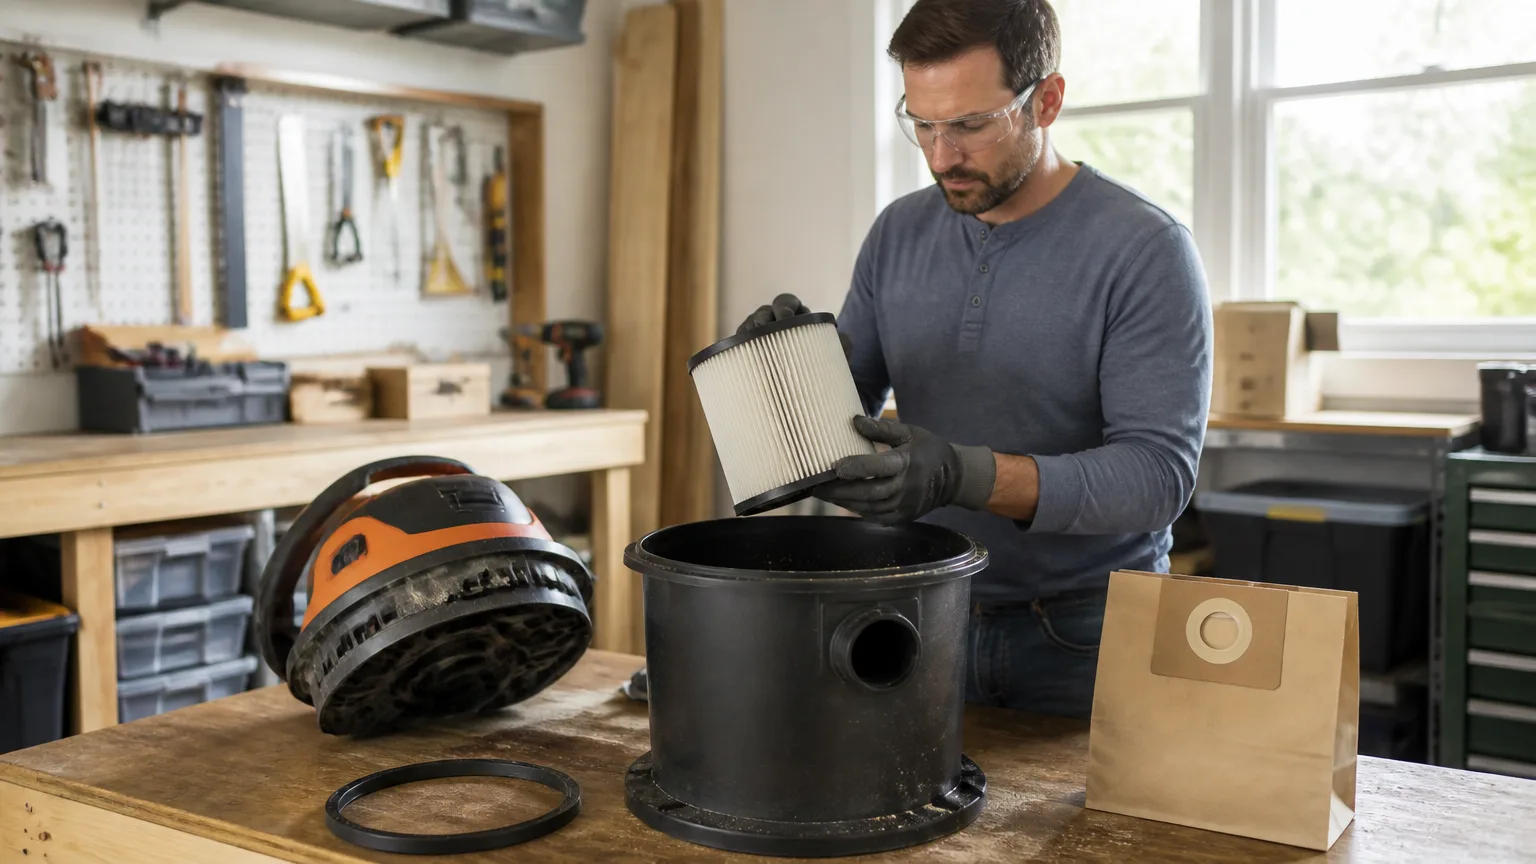
- Inspect the filter media closely. Look for tears, pinholes, split seams, crushed pleats, loose end caps, or a damaged rubber sealing surface. A small opening can let a surprising amount of fine dust reach the exhaust side.
- Check that the filter is fully seated. Depending on the design, it may use a nut, cap, cage, twist-lock, clamp, or push-on retainer. The filter must sit evenly against its mounting surface. Do not force a retainer that does not fit; that can distort the filter or leave a gap.
- Clean or replace it as the manual directs. Be gentle with filter media. Aggressive brushing, compressed-air cleaning, or striking a filter against a hard surface can damage it and send dust airborne. If it remains heavily loaded, damaged, or questionable after cleaning, replacement is the safer choice.
Some vacuums have filters intended for wet and dry use, while others require removing the dry filter before liquid pickup. That difference is model-specific. For example, DEWALT documentation for certain wet/dry models describes removing filters before wet pickup and warns against removing the ball float, which prevents water from reaching the motor. Your vacuum may use a different setup, so rely on its exact manual.
Why a clean-looking filter can still leak
A filter may appear clean from the outside but still be the problem. Fine powder can work into a damaged seam, collect around a warped end cap, or pass through media that is not rated for the dust you collected. If the exhaust dust started immediately after changing filters, revisit the filter part number, orientation, retaining hardware, and contact surface before assuming the new filter is defective.
Check the collection bag and inlet connection
A filter bag is not universal. If your vacuum is designed to accept one, the bag normally connects at the inlet inside the tank so debris enters the bag before it spreads through the drum. A loose bag collar, an incorrect bag, or a torn bag can create a wet dry vac blowing dust symptom even when the main filter is present.
- Use a bag listed for the vacuum’s exact model or compatible model family.
- Make sure the cardboard or plastic collar is pushed fully onto the inlet fitting and secured as the manufacturer directs.
- Confirm the bag is unfolded inside the drum and is not pinched between the tank and motor head.
- Inspect for tears, a split seam, or a collar that has slipped off the inlet.
- Remove and discard a dry collection bag before wet pickup if the manufacturer instructs you to do so.
CRAFTSMAN’s instructions for one fine-dust bag, for example, specify sliding the collar onto the inlet adapter and positioning it between the inlet ribs. That detail illustrates why a bag can look installed while still allowing debris to miss the bag opening. The correct attachment method varies by model.
A bag can improve containment and make disposal easier, but it does not substitute for the required main filter unless the manufacturer explicitly says otherwise. Keep both parts of the filtration path in place when your manual calls for both.
Inspect the lid seal, clamps, and filter sealing surfaces
If the filter and bag check out, look for an air path around them. A leak on the dirty side of the vacuum can pull dusty air toward the motor compartment; a leak at the filter mount can let it cross directly into the clean-air side.
- Remove the power source and lift off the motor head. Set it on a stable surface with the filter facing up or otherwise protected from damage.
- Clean the tank rim and lid contact area. Fine debris stuck on the rim can prevent the lid from closing evenly. Wipe it with a method appropriate for the dust involved rather than blowing it into the air.
- Inspect the lid gasket or seal, if equipped. Look for flattening, cracks, missing sections, or debris embedded in the sealing surface.
- Check the latches. Each latch should close fully without forcing the lid out of alignment. A bent latch, cracked tank rim, or warped lid can leave an opening.
- Examine the filter mounting point. Check for a missing gasket, cross-threaded retaining nut, cracked filter cage, or debris caught under the filter’s seal.
Do not apply household tape, caulk, or an improvised gasket inside the airflow path as a permanent repair. Those materials can fail, obstruct airflow, or shed debris. Replace the correct seal, latch, tank, or filter component, or have an authorized service professional inspect the vacuum.
Float checks matter after wet pickup
The float valve is primarily a wet-pickup protection device. On many machines, it closes off airflow when the tank reaches its liquid limit, helping prevent water from entering the motor. It is not usually the direct reason a shop vacuum dust escaping exhaust problem occurs, but it deserves a careful check if the trouble began after vacuuming water or slurry.
With the vacuum unplugged, consult the manual and verify that the float, cage, and related parts are present, clean, and assembled in the intended position. Do not remove, defeat, or modify the float. A missing or damaged float can expose the motor to liquid and can lead to a more serious failure than a dust-leak complaint.
If you changed from wet pickup back to dry pickup, confirm that the tank was emptied and dried as needed and that the correct dry filter and any required bag were reinstalled. A wet, caked, or improperly installed filter can restrict airflow and may break down during use.
Rule out an exhaust-port mix-up
Many wet/dry vacuums have a blower or exhaust port that accepts the hose. That feature is useful for moving loose debris in appropriate outdoor situations, but it can also cause confusion during reassembly. Make sure the pickup hose is connected to the intake port, not the blower port.
If dust is coming from the motor’s normal exhaust vents rather than the dedicated blower connection, return to the filter, bag, and seal checks. Do not cover or plug normal motor vents to stop the dust; restricted cooling airflow can damage the vacuum.
A practical diagnostic order before buying parts
Use this short order to avoid replacing parts at random:
- Stop vacuuming dusty material and disconnect power.
- Empty the tank carefully and identify what material was being collected.
- Install or verify the correct dry-pickup filter.
- Inspect the filter for damage and make sure its retainer and sealing surface are secure.
- Check the bag type, bag collar, and bag condition if your model uses a bag.
- Clean the tank rim and inspect the lid, gasket, clamps, and filter mount for gaps or cracks.
- Verify the float assembly is intact after any wet use; reinstall dry-pickup components as directed by the manual.
- Reconnect the hose to the intake port, then test with a small amount of ordinary, nonhazardous debris in a well-ventilated area.
If the vacuum still sends visible dust from the exhaust after those checks, discontinue dusty use. Internal filter supports, motor housings, or seals may be damaged, and opening the motor section may not be a safe or useful homeowner repair. Consult the exact owner’s manual or an authorized service professional.
When the material is more than ordinary shop dust
Do not treat all dust as the same. Fine silica-containing dust from concrete or masonry, lead-paint debris, asbestos-containing material, and some metal or wood dusts can create health or fire hazards. OSHA advises using methods that do not generate dust clouds and notes that proper filtration is important when controlling dust exposures. A standard wet/dry vacuum may not be appropriate for the material, even if it appears to collect it well.
For a separate airflow diagnosis, see Shop Vacuum Loses Suction: Filter, Hose Blockage, and Float Valve Checks. Low suction and dust leaking from the exhaust can occur together, but the filter seal and filtration choice should be checked first when visible dust is escaping.
Bottom line
A shop vacuum blows dust out most often because the dry filter is missing, damaged, wrong for the vacuum or dust, or not sealed properly. A misinstalled bag and a dirty or damaged lid seal are close behind. Check those basic parts in order, keep the float system intact, and use the manufacturer’s manual whenever the filter or wet/dry configuration is unclear.